
Blog
Lock, Stock & Barrel strives to stay up to date and with the latest news and to share it with the farming community. Find out what's new in our blog, where we come together to share our latest stories.
Backyard Chicken Tending Basics
 Wednesday, April 2, 2025
Hi, My name is Michele.
I HAVE BEEN BACKYARD CHICKEN TENDING FOR A YEAR NOW WITH MY FLOCK OF 12.
3- BARRED ROCK
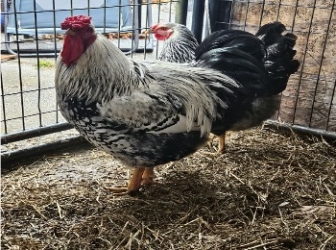
3- Silver laced Wyandotte
2- Silkies
And now 4 jersey giants.
Some may think it’s a hobby but for many of it becomes our therapy
Zoning:
Each town has its own rules and regulations when it comes to their zoning laws and guidelines. It is important to know this well before bringing chicks home, this way you know what your limitations are. Some areas are limited to the quantity of chickens you may have, if you are or are not allowed to keep roosters, or how many acres are required to be able to own livestock. There are typically regulations as to where you can or cannot build your coop. You can find this information by looking on your town’s official website, specifically the Planning and Zoning Department section, or by contacting them directly.
Chicken Coop + Run
Your chicken’s coop is where they will roost, lay, and sleep. It needs to be a sheltered structure, and it is important it meets the following requirements:
- 4 sq ft of space per bird
- Draft free
- Proper ventilation
- Roosting bars
- Nesting boxes
- Bedding
(It is not recommended to have food or water inside the coop. This is best kept out in their run.)
Your chicken run is a fenced in outdoor area where they will spend the most of day light hours eating, roosting, roaming, scratching, and foraging.
- 10 sq ft per bird to prevent from over crowding,
- Food and fresh water
- Covered area to protect from direct sunlight
- Dust Bath (diatomaceous earth, ash, dirt)
- Hardware cloth to line the run (not chicken wire)
- Good drainage to prevent muddy conditions
- Enrichment items like perches, swings, food kabobs , scratch grains
Brooder Setup:
You can use many different methods to make an acceptable chick brooder. Some use plastic large totes, small stock tanks, kiddie pools, aquariums, wooden boxes, or dog crates. Whatever approach you may take there are essential brooder components you will need to have:
- 1sq ft per bird is recommended as they double in size their first 2 weeks of life then up to 2 sq ft at 4-8 weeks.
- Heat Source (90-95 degrees for the first week, gradually decreasing by 5 degrees each week after)
- Thermometer
- Bedding (pine)
- Feeder
- Waterer (shallow to prevent drowning)
- Ensure your heat source is secure to prevent fires. Keeping the heat directed to one side of the brooder is best so the chicks do have an area of the brooder available if cool off if needed.
Other essentials:
- Chick Starter feed
- Electrolytes
- Chick Grit
- Heat lamp / Brooder Plate
So, we have covered their set up, lets now talk about their general care. Always wash your hands before and after tending to your chicks to prevent the spread of disease. Be sure to provide constant fresh food and water.
During their first two weeks of life the chick’s bodies are acclimating to digesting and processing their food. This can often cause what we call ‘pasty butt’. It is essential you tend to and clean this up as it can impact the chick’s overall health. Pasty butt can be treated by either soaking the area in warm water or by dampening a paper towel in warm water, then carefully remove the hardened droppings. Be gentle to avoid pulling off feathers or skin.
Make time to handle and get to know your chicks. Them being comfortable being handled will help you in the long run, especially during times when medical intervention is necessary, it makes the process less stressful for both you and the bird. Birds are natural prey so its best to approach them from below as opposed to above, much like a predator would.
General Chicken First Aid:
We all hope it won’t happen to us, but it is always best to be prepared and have the essentials on hand for those oh-nos that come and go when it comes to animal care.
Recommended items are:
- Vetricyn wound care
- Gloves
- Saline
- Bag Balm or Vaseline
- Gauze and Vetwrap
- Epsom Salt
- Electrolytes and Vitamins
- Feeding syringe
- Kwikstop styptic powder
During their time in the brooder, you are reducing the heat temperature to acclimate them to ambient temps for your area. Once your chicks have become fully feather and the outside temp is consistently above 55 degrees day and night, they are able to go out into their coop!
Once your feathered friends are in their new home your new daily responsibilities will include going out in the morning to open coop doors to allow chickens access to the run, providing fresh food and water, collecting eggs, as well as closing the coop doors at night. This keeps your flock safe at night keeping predators from getting them at their most vulnerable while asleep. Most chickens get into the habit of going into the coop on their own around dusk which is super helpful!
How to brave the winter:
Making the decision to get chickens means you also need to prepare for extreme weather to ensure the health and safety of your flock. The following is recommended to prevent successfully winterize the coop:
- Insulate- Add insulation to the coop walls and roof to retain heat and keep cold out using materials like foam board, straw bales or blankets.
- Draft proofing- seal any gaps or cracks to prevent drafts that can cause frostbite.
- Deep litter Method- Use a thick layer of bedding on the coop floor, This provides insulation and generates heat as it decomposes.
- Keep water from freezing- you can do this by providing heated poultry drinkers or change water frequently.
- Run- Cover your run with plastic panels or traps to provide a wind barrier around your run.
It is important to monitor your hens when they do reach laying age to ensure their health. Knowing things like how to tell which hen is or isn’t laying, what a healthy comb looks like, what the signs of a sick chicken are. Common issues are bumblefoot, sour croup, impacted croup, egg bound, mites or lice, respiratory infections, cuts and abrasions, etc. Its good to research and learn about possible situations so you are ready to intervene and treat when necessary.
***Of course it is always best to seek professional veterinary care.***
As your chickens grow over the next few months they will soon start laying. Generally, between 6-8 months is when you should see your first eggs (depending on breed). The first few will be on the smaller side but give them time and the egg will double in size! By 18 weeks it is recommended to start introducing layer feed, to ensure proper calcium consumption which is crucial to egg laying.
If you have a rooster it is recommended to feed an ‘all flock’ safe feed which does NOT contain added calcium, which can be bad for a rooster that does not need it. You can always offer calcium supplements like oyster shell for those who need the added benefit.
Chicken fun facts:
Did you know chicken’s poop once every 30mins awake or sleeping!?
Chickens can see more colors than the human eye!
Chickens have a small gland at their base of their tail feathers that secrets an oil they use to prune their feathers. This is what makes their feathers waterproof!
- Chickens need 14hrs of sun light to produce one egg.
- Chickens are omnivores meaning they eat meats, insects, seeds.
- Chickens go through a process called molting where they lose their feathers to make room for new ones to grow.
- You can tell the color egg a chicken will lay based on the color of their earlobe.
- Chickens do have what is called a ‘Pecking Order’ where they form a hierarchy.
- Depending on the breed chickens can lay a variety of colored eggshells including white, cream, tan, brown, pink, blue, and green.
- Some chickens can produce over 300 eggs per year.